When it comes to vegetable gardening, tomatoes
are a staple! As you likely know, I’m an advocate of Square Foot Gardening. For
maximizing your garden space (and harvest) SFG spacing is incredible – especially, when using the square-foot, seed spacing tool, Seeding Square! However, as we all know - gardens are like
snowflakes…each one is unique unto itself.
There are so many ways to grow vegetables, and not all of them work in conjunction
with Seeding Square – you can’t put a square-foot spacing tool in a round
container for example.

This past season an avid gardener, and Seeding Square fan reached out to me with his approach to planting tomatoes. It’s genius! If you’re a DIYer and want to add a few extra (portable) tomato plants to your garden, this is something you’re going to love - we're transforming 5-gallon buckets into the most epic tomato growing setup ever!

What you'll need:
- food grade 5-gallon plastic bucket (with lid)
- plactic tube or pipe
- planting pot or 2L pop bottle
- cotton string
- a drill and drill bit
- tomato cage
- paracord
- old blue jeans/denim
- plactic tube or pipe
- planting pot or 2L pop bottle
- cotton string
- a drill and drill bit
- tomato cage
- paracord
- old blue jeans/denim
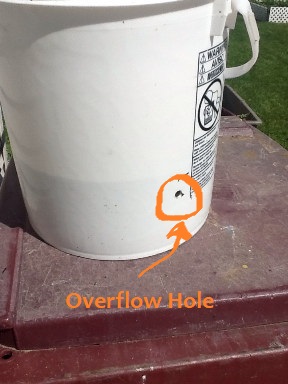
Start with the 5-gallon plastic bucket. Trim the lid to fit inside the bucket. It is going to become the false bottom. The bucket is probably tapered - you want the cut lid to fit about 6 inches from the bottom.


Now it's time for the soil and to plant your seeds or seedlings!
Heads up, don't use garden soil. It's too heavy. Use a mixture of potting soil, vermiculite and ground-up eggshells for calcium for the tomatoes.
Sometimes tomato plants put out branches that have a hard time supporting the tomatoes. So tie them up! Daune says, do NOT use string. A breeze can cause the branch to be sawn by the string. His solution? Make your own support 'strings'. An old pair of bluejeans cut into strips about an inch wide is great to tie up the branches. If you do not pull the knot too tight, they come apart just fine. Even better, they can be washed and reused.
Here is a picture of Duane's tomato garden. Pretty spif huh?

Thank you Duane for sharing! Also, for those intrigued with Seeding Square spacing, here's a pic recently submitted of a budding green thumb using Seeding Square to plant his Square Foot Garden – please see the following (paid) link for more details on Seeding Square. (Seeding Square Product Details) Pssst - it makes a great gift for gardeners young and old.
